HEY Y'ALL, We had the best time last night at my Christmas Card class. We were a smaller class than normal, but that just made it more personal and more fun. We made some awesome cards that I would like to share with you. IF you decide to use my ideas, PLEASE be kind and give me credit for them. It is how we roll, right?
The first card below is what I call a funky fold card. The base of my card is cherry cobbler card stock.
The two outside edges went through the big shot with the petals a plenty embossing folder, then I added dots of Dazzling Details for accents. I stamped the Stocking stamp with old olive ink on white card stock, then punched it out with the Stocking Builder punch. I punched out the top, heel and top of the stocking out of silver glimmer paper. It adds a special bling. I used designer paper behind the stocking. I stamped with cherry cobbler ink the sentiment on pear pizzazz card stock and fussy cut the top. I think this is the LAGNIAPPE or special finish to make the card special, don't you? I love how it sits up on the designer paper - it is just the perfect touch.
Thanks to Create with Dee for the idea of just embossing the two outside edges with the embossing folder. Hi Dee Slater!!
I would love to hear your comments on this card.
Card Two: This card is from an idea from the web = I can't remember whose site it was, but I love the idea. I used the northern flurry embossing folder that was brayered with ink first. This is how I got the white snowflakes on the card.
Marina mist and bashful blue ink and card stock, decorative label punch for the sentiment, rhinestones in the middle of the die cut snowflakes, and then dazzling details here and there on the embossed snowflakes are what make this card. I used the ruffled Island Indigo ribbon on the top. You can't see the bling very well but it is quite elegant in person.
Card 3:
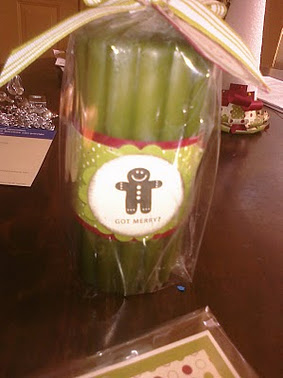
Got Treats stamp set is what I used for this card. Love this little gingerbread boy. Last year's designer series paper was used as well as old olive card stock. Red fine glitter was used on his little buttons and it was all finished off with olive and white striped ribbon. Last night we also added a layer of red glimmer paper behind the dsp and in front of the old olive card stock. It really made it POP.
This candle matches the card for the perfect gift.
It is just a belly band around the candle that can be removed when it is lit. Such a cutie patootie gingie.
Two more projects I will share with you tomorrow. One is my absolute favorite!!
Still cleaning up and putting supplies away from last night's fun. Go get some inky fingers y'all!!


I love your cards! Especially the first one Would you mind sharing the instructions?
ReplyDeleteFabulous cards, Jennifer! I really like the embossed panels on your first card! Awesome!
ReplyDelete